Learn to look slowly and draw decisively. You’ll follow edges with your eyes while the pen follows along, then practise putting a line down in ink once, without fuss, and correcting it without an eraser.
6 exercises
About 3 hours, spread over a week or two
Pen only from here on
Core ideas
A contour is an edge you can see
It’s the place where a form turns away from you or passes behind something else. That includes edges inside the shape, such as a fold in a leaf, a knuckle crease, or the line where a wall meets the ground. A contour drawing follows those edges, not a guessed outline.
Commit, then restate
In ink, a decisive line that’s slightly wrong is worth more than a timid line that’s nearly right. If it’s wrong, draw the right line next to it and leave both. Nothing gets erased.
Big lines come from the shoulder
Draw long lines with your whole arm, keeping the wrist still, and use the wrist and fingers only for small details. Lines drawn from the wrist curl and wobble over any distance.
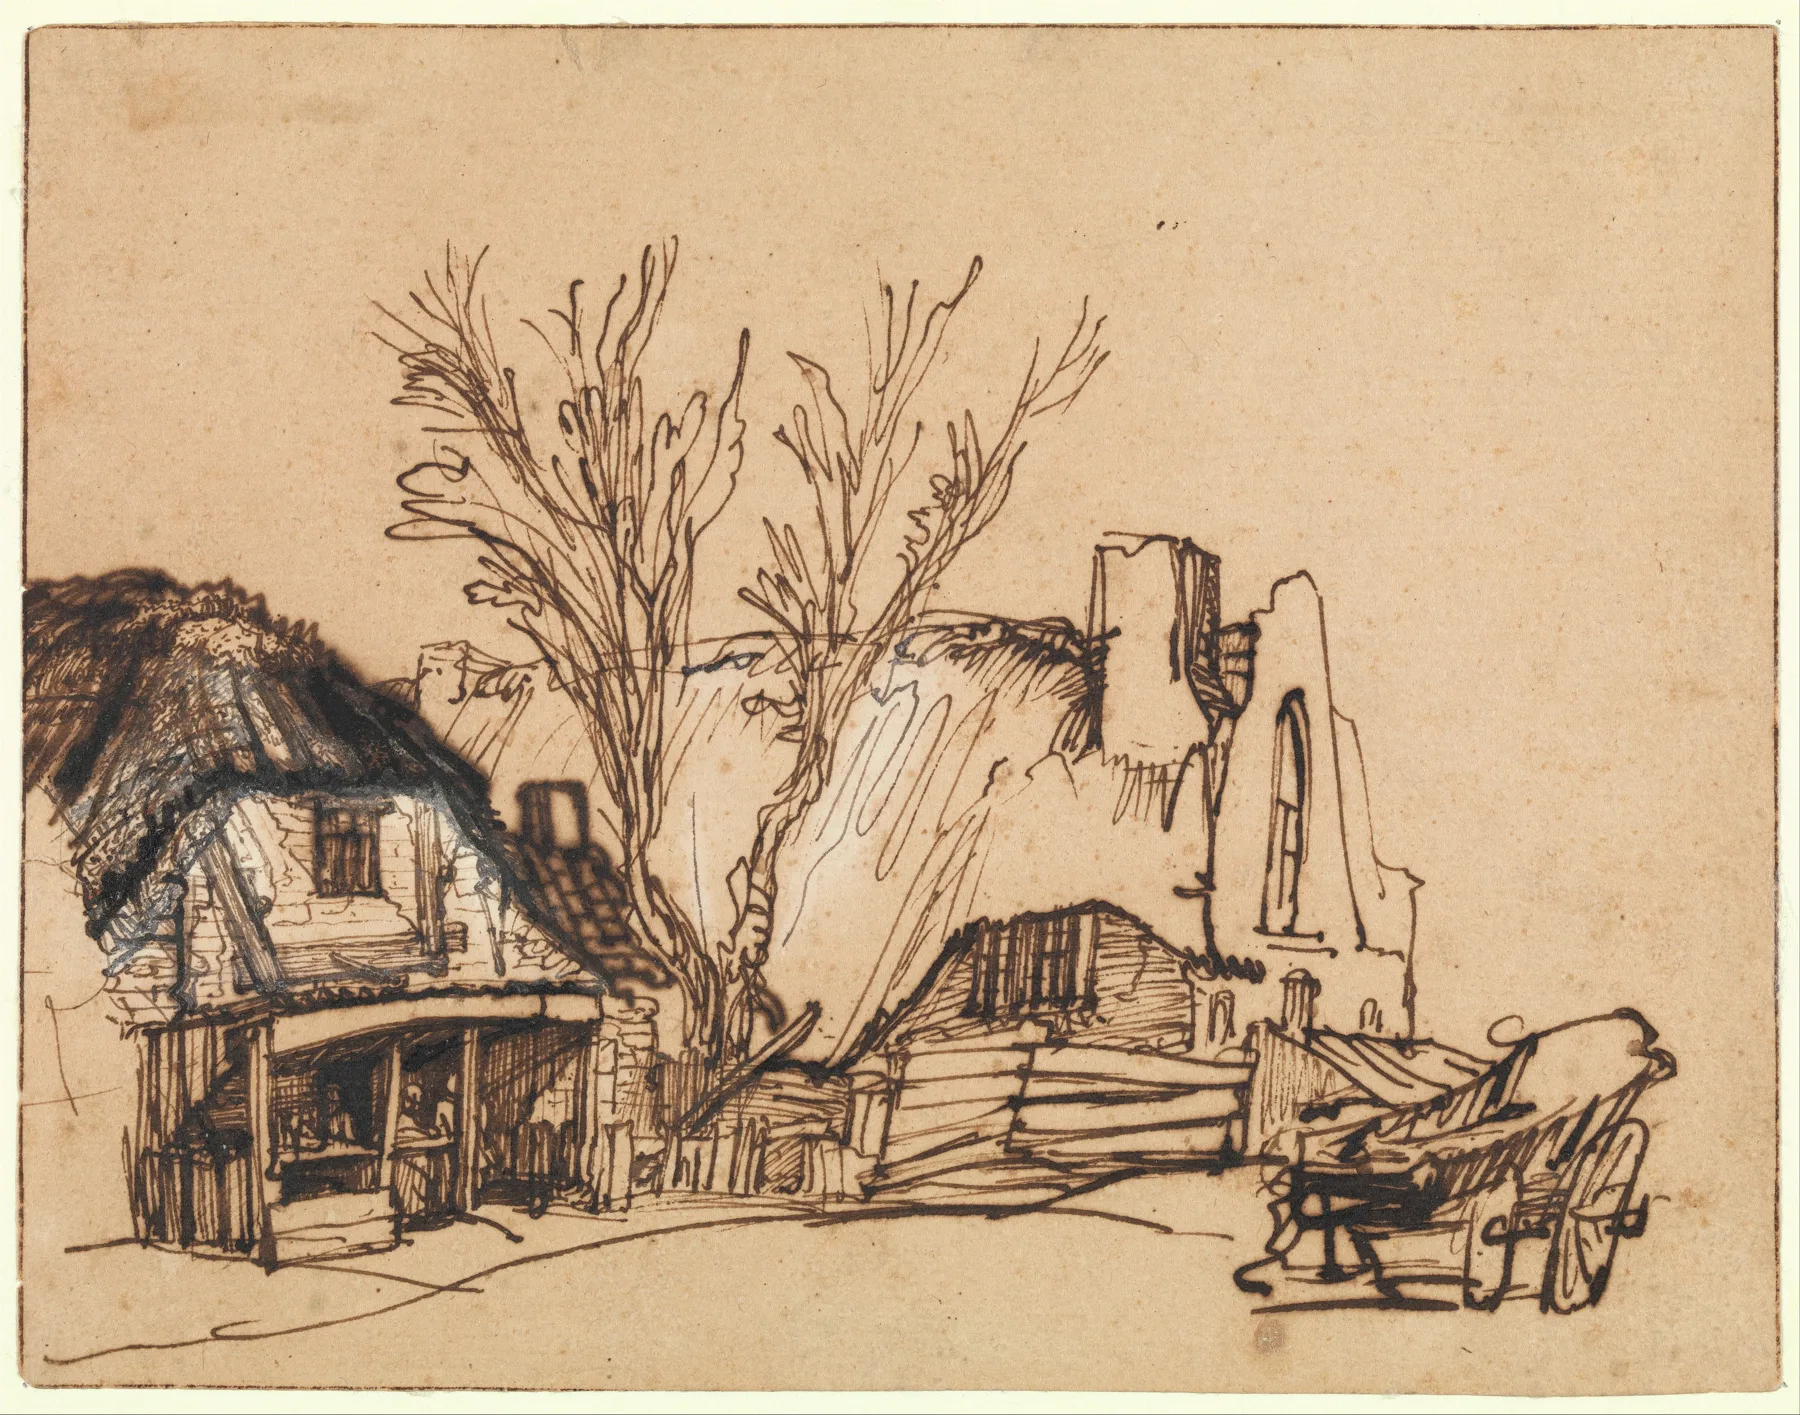
Rembrandt drew these cottages in a sheet about the size of a small sketchbook. Every line is put down once, at speed. Some are thick, some broken, none fussed over.
Rembrandt van Rijn, Two Cottages, c. 1636. Pen and brown ink. The Metropolitan Museum of Art, Robert Lehman Collection, 1975. Public domain (CC0).
Exercises
Do them in order the first time. After that, use the ghosting page as a warm-up before any session, and mix in the others as you like. Start the gesture warm-ups now too, because Module 12 will need them.
Ghosted lines into ink
5 min
Setup
The ghosting sheet or a blank page, and your pen. Sit or stand so your whole arm can move freely.
Steps
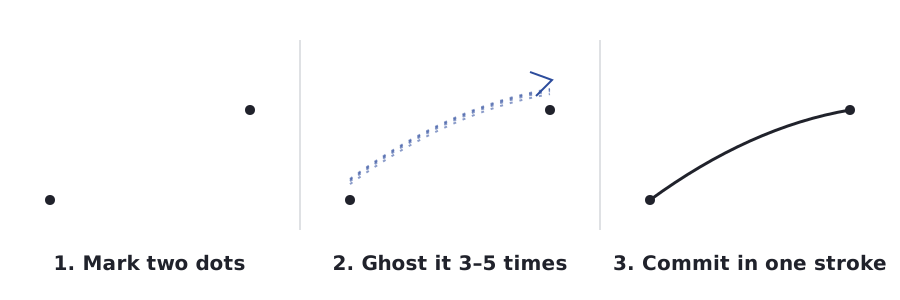
Pick a pair of dots, or mark your own.
Hover the pen just above the paper and rehearse the stroke from the first dot to the second 3–5 times, moving from the shoulder.
Without pausing, lower the pen and draw the line in one stroke at the same speed as the rehearsal.
Don’t correct it. Move to the next pair. Mix straight lines and gentle curves, short and long, in every direction.
Why
Rehearsing the stroke plans where the line goes, and the speed keeps it smooth. It’s the same habit you’ll use for every long edge of a building later on.
Success looks like
Smooth lines with no wobble and no blobs at the ends. Most lines land within a few millimetres of the target dot. Being a little off target is fine, but a wobbly line isn’t.
Your pen, a sketchbook page and a timer. Three subjects in order: your own non-drawing hand, a crumpled paper bag, then a plant. Turn your chair so the paper is beside you and out of your line of sight.
Steps
Fix your eyes on one point on the subject’s edge and put the pen on the paper.
Move your eye along the edge very slowly, and let the pen move at exactly the same pace. Imagine the pen is actually touching the edge you’re looking at.
Follow every bump and turn, including edges inside the shape: creases, folds and overlaps.
Don’t look at the paper until the timer goes. Start with 5 minutes and work up to 15.
Why
It forces your eye to lead your hand and stops your brain from drawing a symbol of a “hand” or a “leaf”. It trains the slow, specific looking that every later module relies on.
Success looks like
A distorted, scribbly drawing packed with small, specific wiggles. If the proportions are wildly off, that’s normal and doesn’t matter. A smooth, simplified outline means you went too fast.
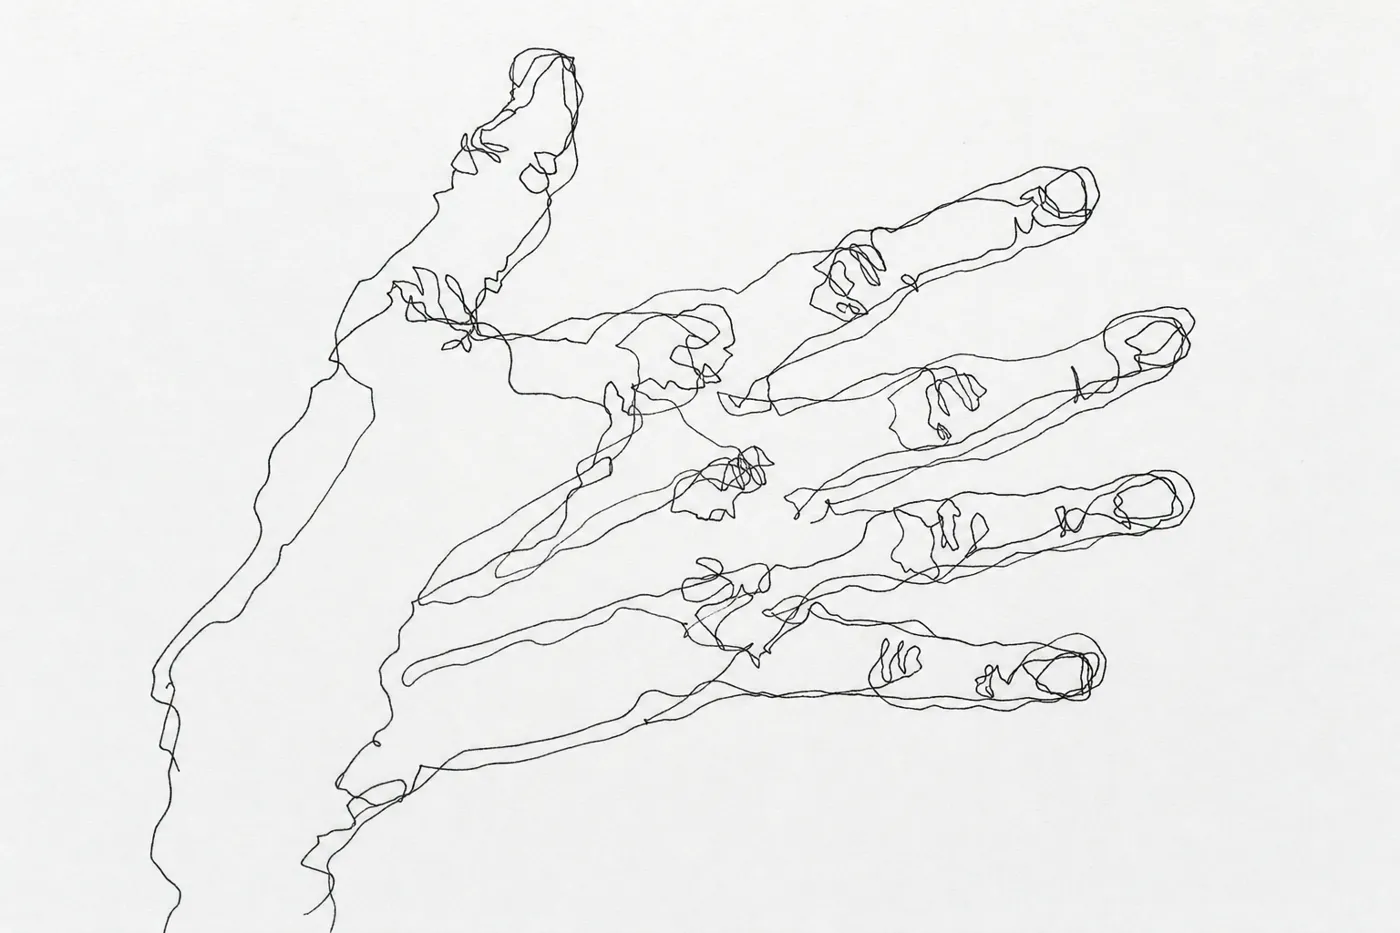
A good blind contour. It’s wrong as a likeness and right as looking: every knuckle and nail edge has been noticed.
After Kimon Nicolaides, The Natural Way to Draw (1941), and the “pure contour” exercise in Betty Edwards, Drawing on the Right Side of the Brain.
Modified contour
2 × 15 min
Setup
A potted plant with clear leaves, your pen and a sketchbook page you can see this time.
Steps
Draw the same way as blind contour: slow eye, slow pen, edges in and out of the shape.
You may glance at the paper, but only to place the pen where a new edge starts or where two edges meet. Then go back to the subject.
Aim to spend about 80% of the time looking at the plant.
Do a second drawing of the same plant from a different side.
Why
It’s the bridge from pure looking to a usable drawing. You keep the observation of blind contour and gain enough control for the drawing to hold together.
Success looks like
Mostly single, unhesitating lines. Leaf edges have their own scallops and folds, and overlapping leaves show which is in front. The plant is recognisably this plant, not “a plant”.
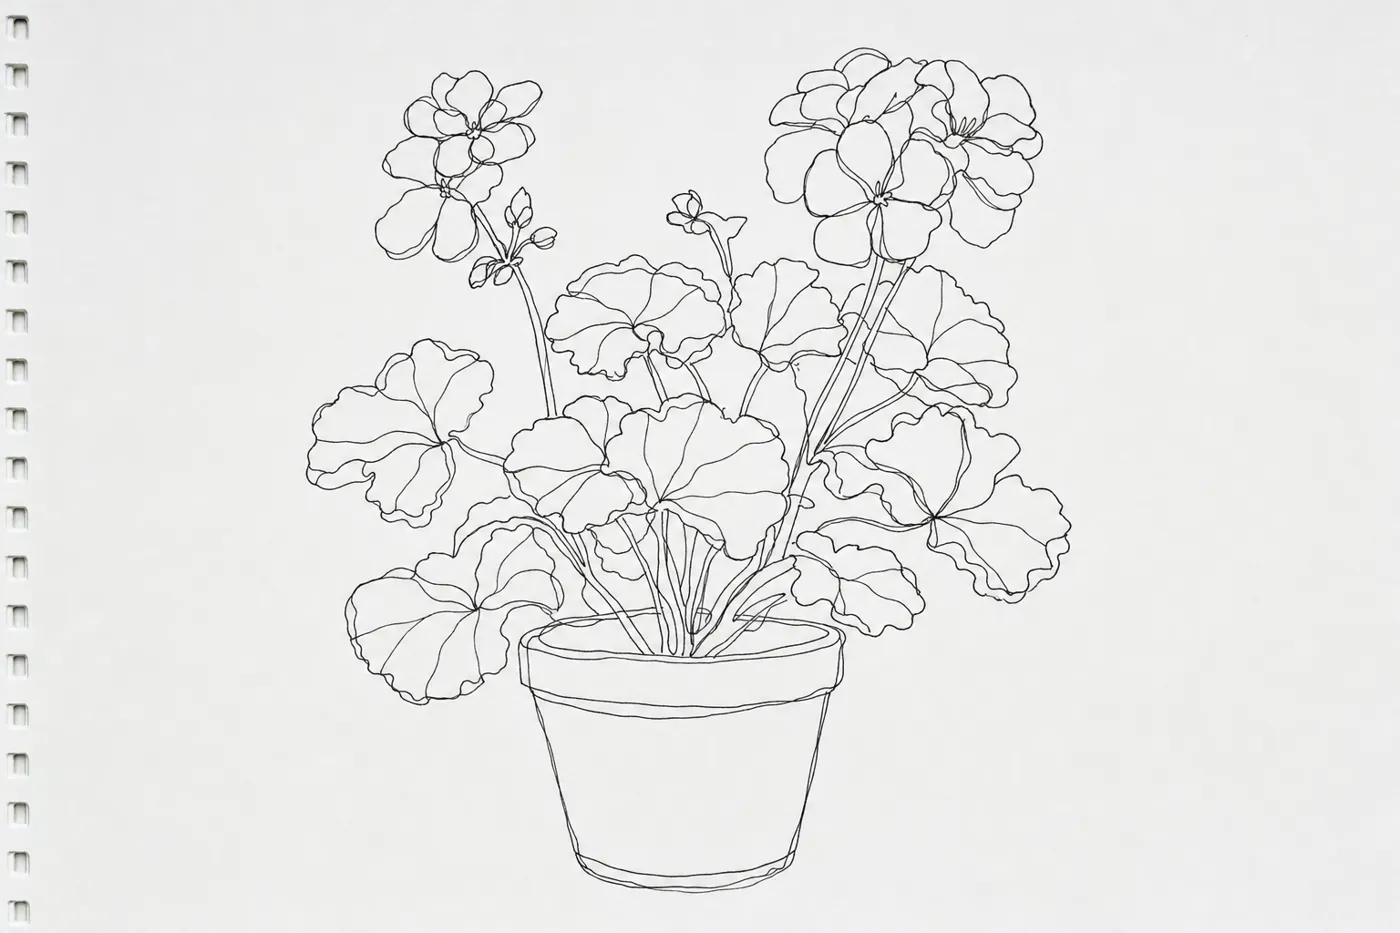
Single lines and specific leaf shapes, with overlaps that show depth.
After Betty Edwards’ “modified contour”, Drawing on the Right Side of the Brain.
Continuous line
10 min
Setup
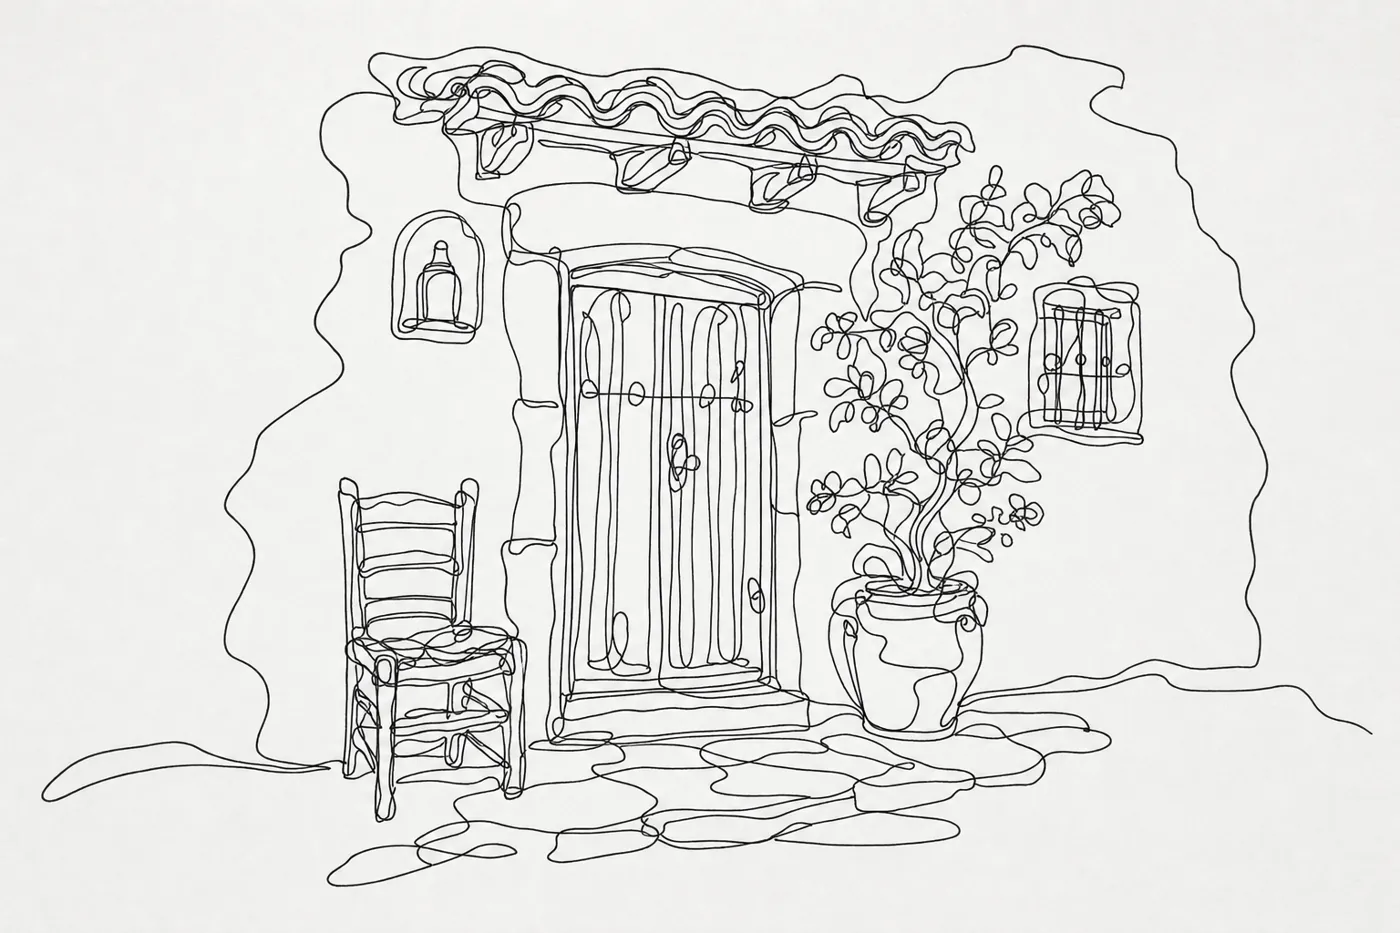
A small scene: a doorway with a chair, a corner of the kitchen, or a shelf. Use your pen and a timer.
Steps
Put the pen down anywhere and don’t lift it until the timer goes.
Travel from object to object along edges. To reach somewhere new, cross over shapes or double back along a line you’ve already drawn.
Keep moving at a steady, slow pace. You may look at the paper.
Why
Without the option to stop and restart, you have to keep looking and decide where to go next. It also loosens your hand and shows how one line can hold a whole scene together.
Success looks like
One unbroken line, and the whole scene readable from it. It will look busy and loopy, which is fine.
One line, never lifted: door, chair, plant and wall all connected.
After Liz Steel’s continuous line exercises in SketchingNow Foundations.
Restate, don’t erase
15 min
Setup
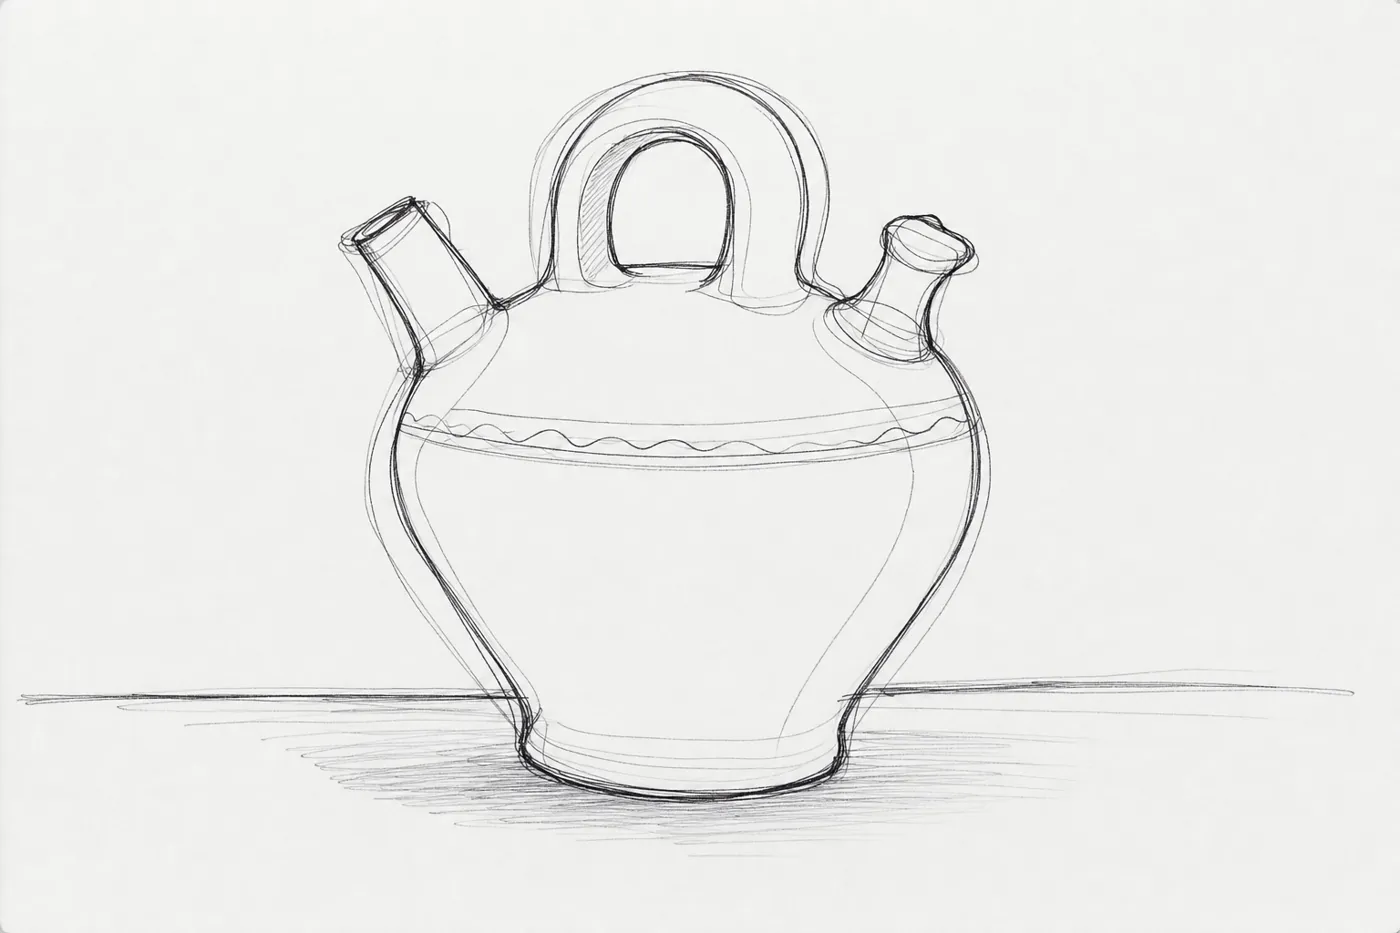
An object with a clear, curving shape, such as a jug, a botijo or a kettle. Use your pen. You won’t need an eraser.
Steps
Draw the object at a comfortable speed, looking often.
Each time you see a line is wrong (a belly too thin, a handle too low), draw the correct line beside it.
Leave the wrong line where it is. Keep going.
When you finish, look at which lines you restated. That tells you which shapes you misjudged.
Why
Ink can’t be erased, so you need a way to correct that keeps you moving. Restated lines also add life to a drawing, and you’ll see them in the sketches of most good draughtsmen.
Success looks like
A finished drawing where the corrected shape is clearly right and the first attempts are still visible. No scribbled-out patches and no abandoned starts.
The first guesses stay on the page and the corrected lines win.
After Bert Dodson’s “restatement”, Keys to Drawing (1985). Verify against book
One edge, one stroke
20 min
Setup
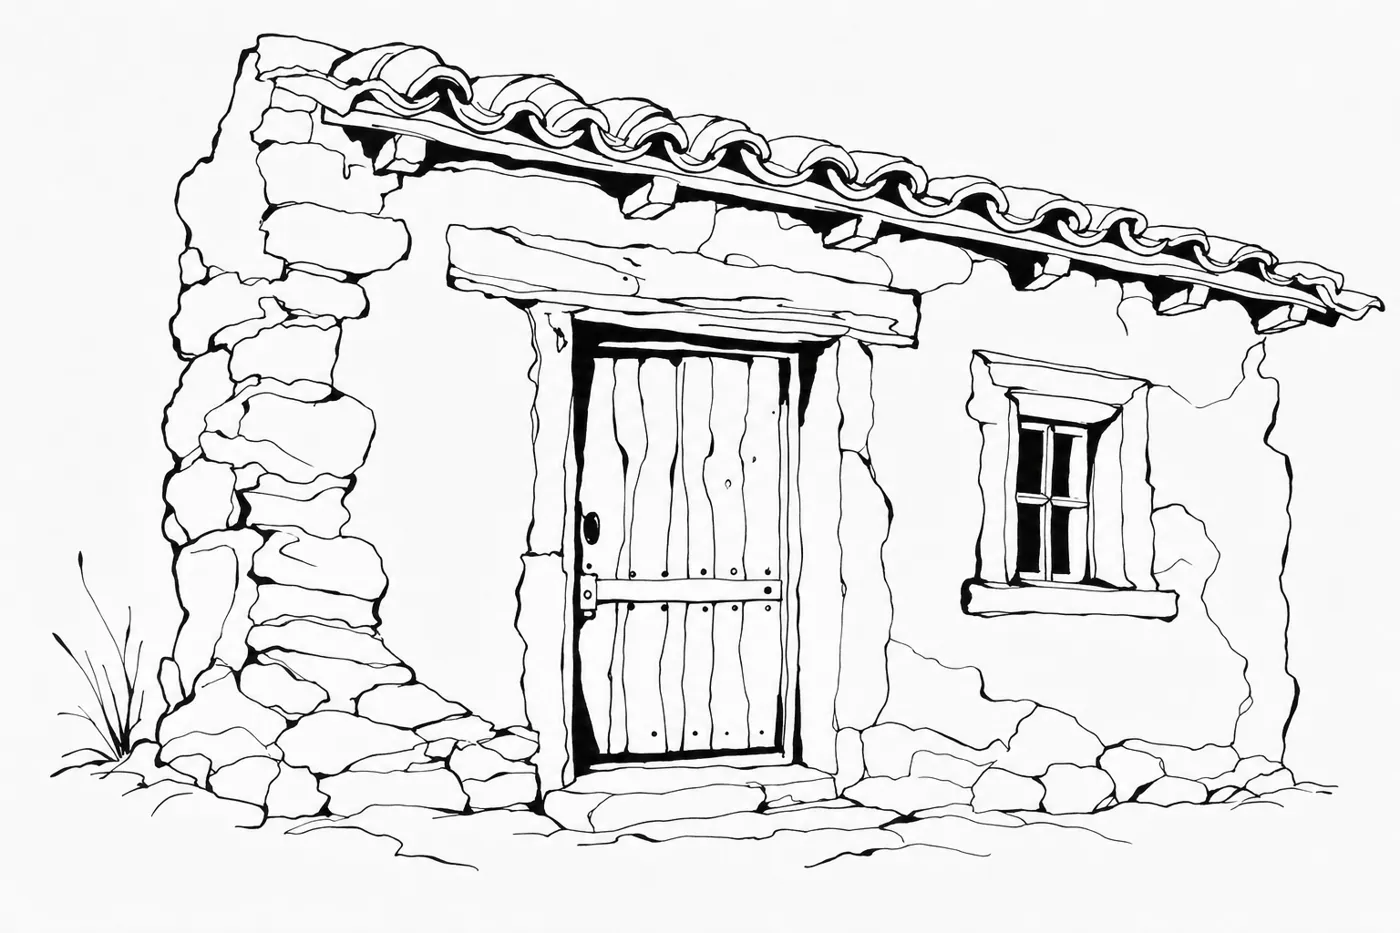
A simple building front from life: a doorway, a shed or a house end. Sit somewhere comfortable and use pen only.
Steps
Look at an edge until you know where it starts and ends. Ghost it once in the air.
Draw it in a single stroke. Don’t sketch it in with several small ones.
Press a little harder on shadow sides and where things touch the ground, and lighter on lit and distant edges.
When the drawing is done, fill in two or three of the very darkest spots in solid black, such as inside the doorway or under the eaves.
Why
This is the line you’ll use under every wash later on. It’s confident, varied in weight and economical. The few solid blacks give the drawing punch for almost no effort.
Success looks like
Each edge is one stroke, with no hairy patches. Line weight visibly varies, and a few small solid blacks are in the deepest places.
Thick lines where things are heavy or shadowed, thin where they’re lit, and solid black only in the deepest recesses.
After the line and spot-black passes of Marc Taro Holmes’ three-pass sketch, The Urban Sketcher (2014).
Common mistakes
Hairy lines. Many short, overlapping strokes along one edge, like fur. It comes from not knowing where the line goes before starting. Ghost the stroke first, then commit.
Blobs at the ends. Small dots or hooks where the pen paused before or after the stroke. Ruskin noticed this too: a slow pen “leaves a little dot of ink at the end of each line”. Start moving before the pen touches down.
Missed joins. Lines that stop short of a corner or shoot well past it, so shapes don’t close. Look at where the line ends before you draw it.
Wobbly long lines. Tremor from drawing with the wrist. Lock the wrist and move from the shoulder.
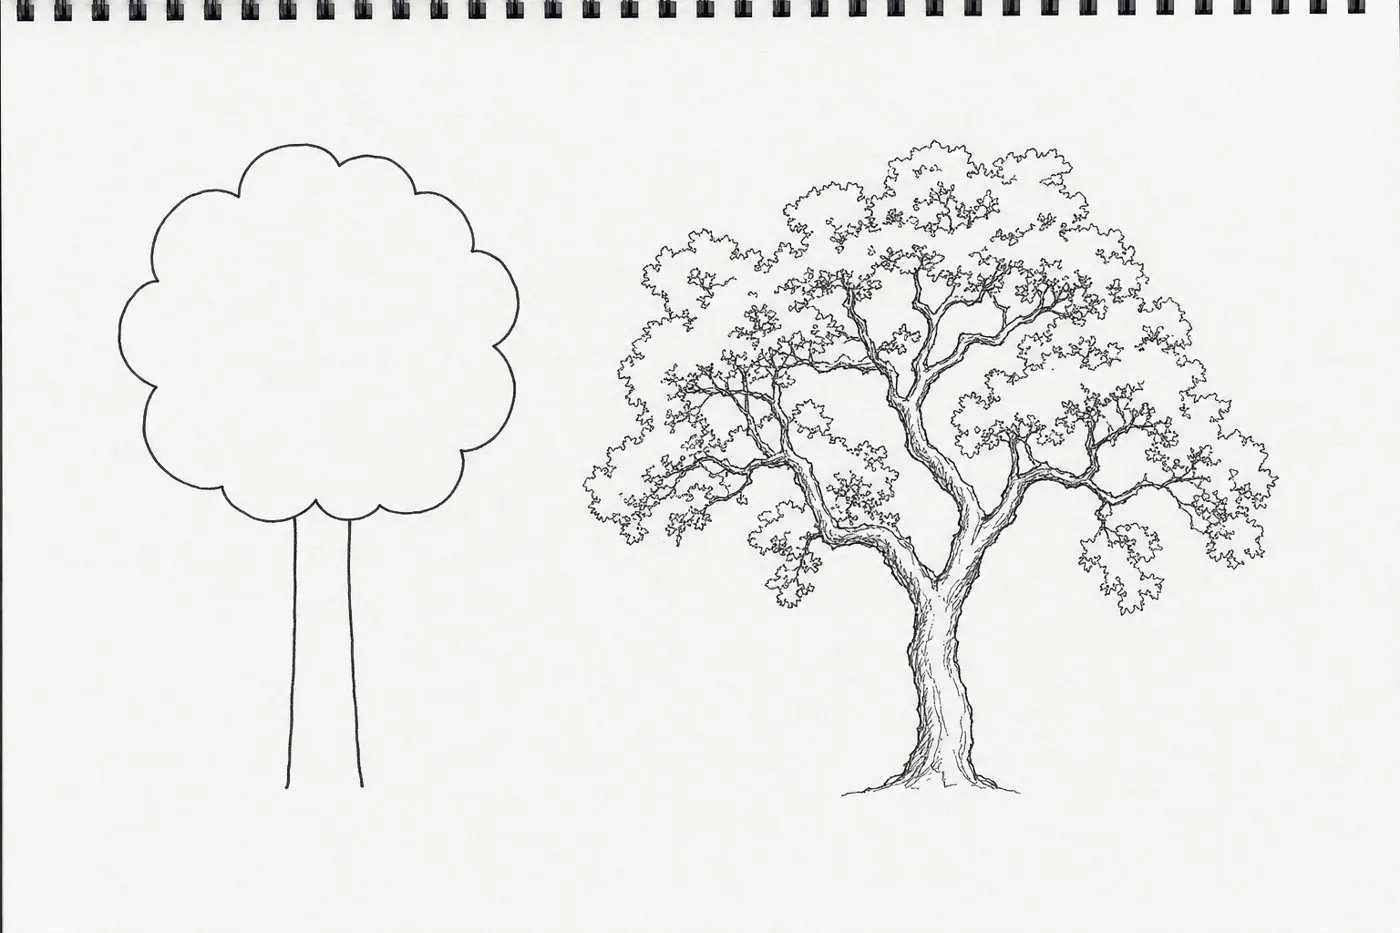
Symbol-drawing. Lollipop trees, identical leaves, a generic house. Your memory is drawing instead of your eyes. Go back to slow contour.
Left: the symbol for “tree”. Right: a tree someone looked at.
Rubric
Line continuity: edges are mostly single strokes, not chains of short feathered ones.
Clean ends: no visible blobs or hooks where lines start and stop.
Observed specificity: edges show the irregularities of this particular object, not generic shapes.
Restatement: mistakes are corrected by restating, not erased, scribbled out or abandoned.
Long lines: lines longer than about 5 cm are smooth, not wobbly.
Each point scores 0 (missing), 1 (partly) or 2 (clearly there).
Ready to move on when…
A page of blind contours shows slow, sustained looking, with dense and specific edge information.
A modified contour of a plant in pen has mostly single, unhesitating lines.
You’re comfortable drawing small subjects straight in ink, with no pencil first.
Further resources
Drawabox: ghostingThe ghosting method in full, with drawing from the shoulder.