Get a small kit together, start drawing for ten minutes a day, and make an honest record of where you’re starting from. There’s no quality bar in this module. The point is to begin.
4 exercises
About 3 hours of drawing
Plus 7 days of the daily habit
Core ideas
Drawing is learned, not given
Drawing well is mostly seeing well, and seeing is a skill you train like any other. Ruskin’s course was written for people with no teacher, and he was blunt about it:
I have never yet, in the experiments I have made, met with a person who could not learn to draw at all.
John Ruskin, The Elements of Drawing (1857)
It takes practice hours, like an instrument
Ruskin compared drawing to the piano and reckoned drawing is the easier of the two. His estimate was “some hundred and fifty hours’ practice” to draw faithfully whatever you want to draw. That’s an hour a day for about five months, which makes it a project, not a lifetime.
It is much easier to learn to draw well, than it is to learn to play well on any musical instrument.
John Ruskin, The Elements of Drawing (1857)
Symbols versus seeing
When you draw from memory, your hand draws symbols: the lollipop tree, the box house, the almond eye. Drawing from life means noticing what’s actually there instead. Every module in this course is a way of swapping a symbol for something you’ve seen.
Every page is practice
A sketchbook is a practice log, not a gallery. Ugly pages are where the learning happens. Don’t tear them out.
Exercises
Assemble and test your kit
30 min
Setup
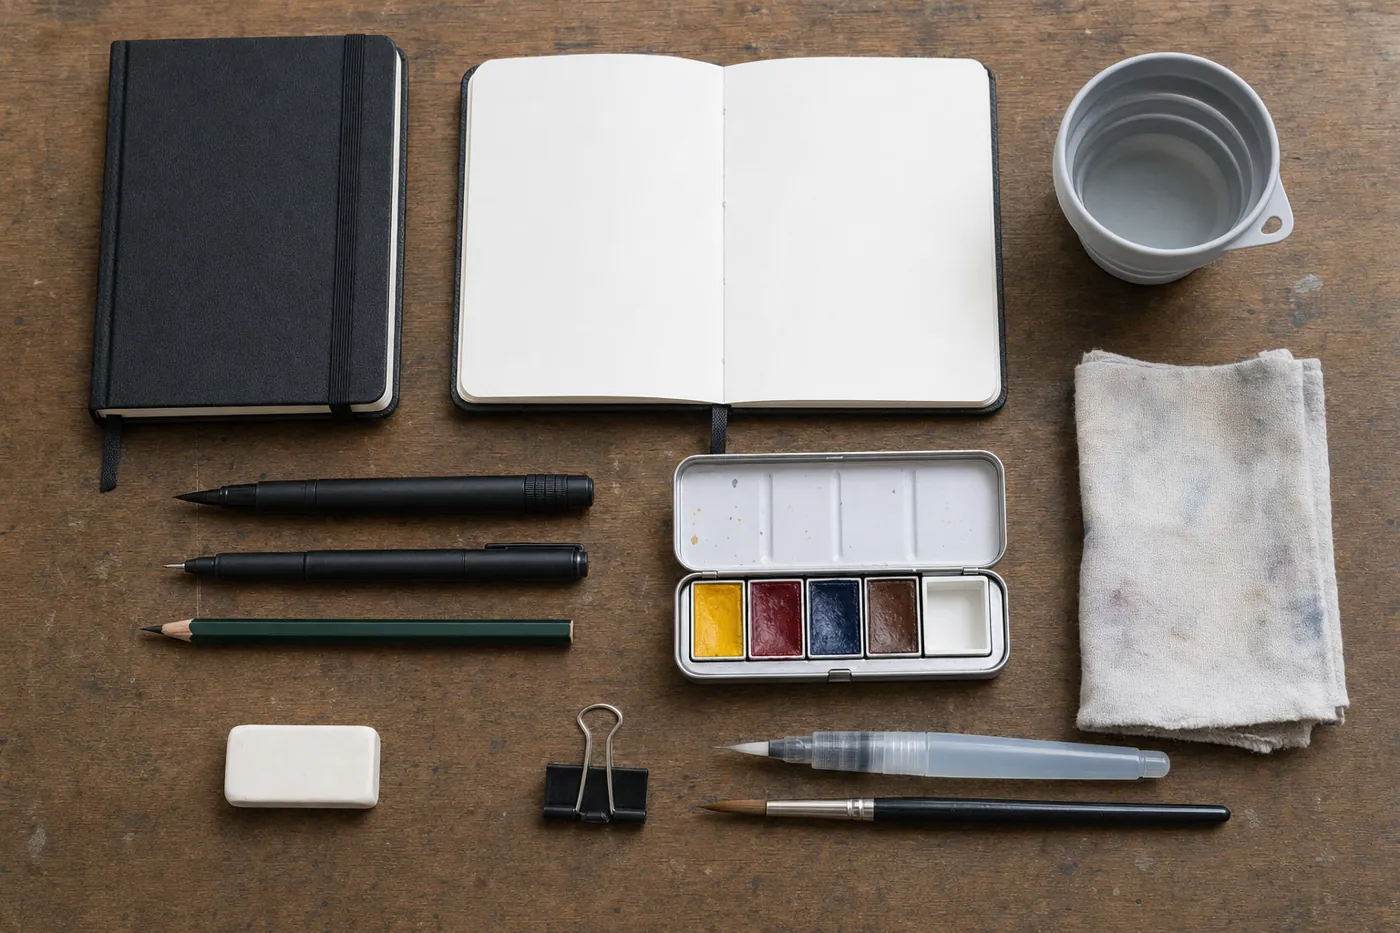
The essential kit from the materials page: a watercolour sketchbook, a waterproof pigment pen, a pencil, a small palette, one round brush, a water pot and a rag. Buy less than you think you need.
Everything here fits in a coat pocket and a small bag.
Steps
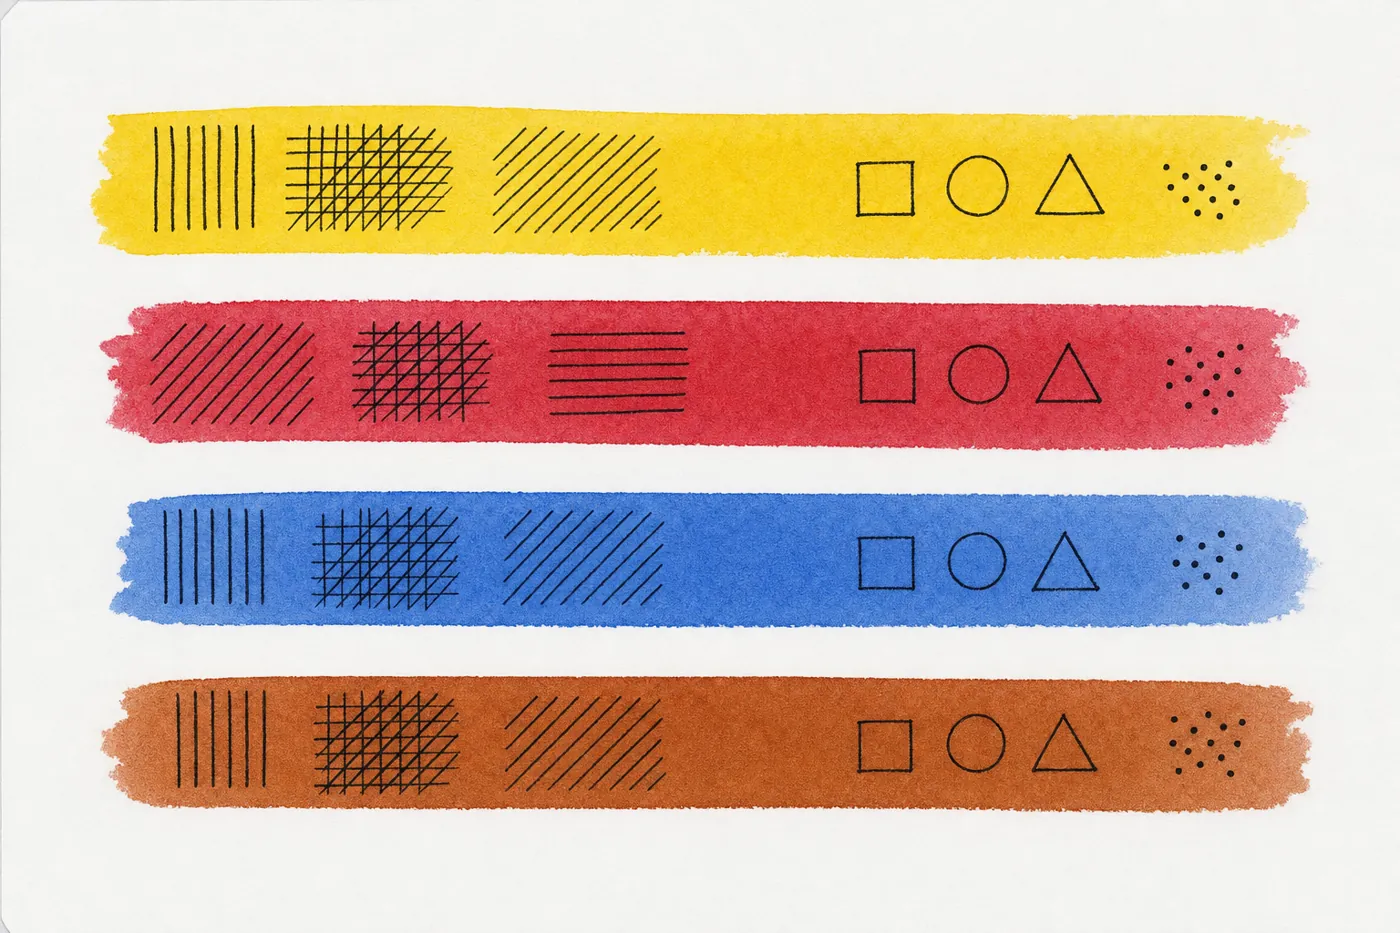
On the first page of the sketchbook, draw a few rows of pen marks: lines, hatching, a scribbled patch, some dots.
Wait one minute for the ink to dry.
Paint a stripe of each colour straight across the ink with a wet, loaded brush. Go over one stripe twice.
Let it dry, then look at the back of the page.
Why
Pen and wash only works if the ink is truly waterproof and the paper can take water. It’s much better to find a smudging pen now than halfway through a sketch you care about.
Success looks like
The ink lines stay crisp and black under every stripe. Nothing smears or turns grey. The back of the page is clean, apart from a little cockling.
A passing test: the ink is untouched by the paint.
If a pen fails, it isn’t waterproof enough for pen and wash. The materials page lists pens that pass.
Memory, then life
2 × 10 min
Setup
An ordinary object you know well, such as a pepper, a mug or a shoe. Keep it out of sight to begin with. Use pen and a timer.
Steps
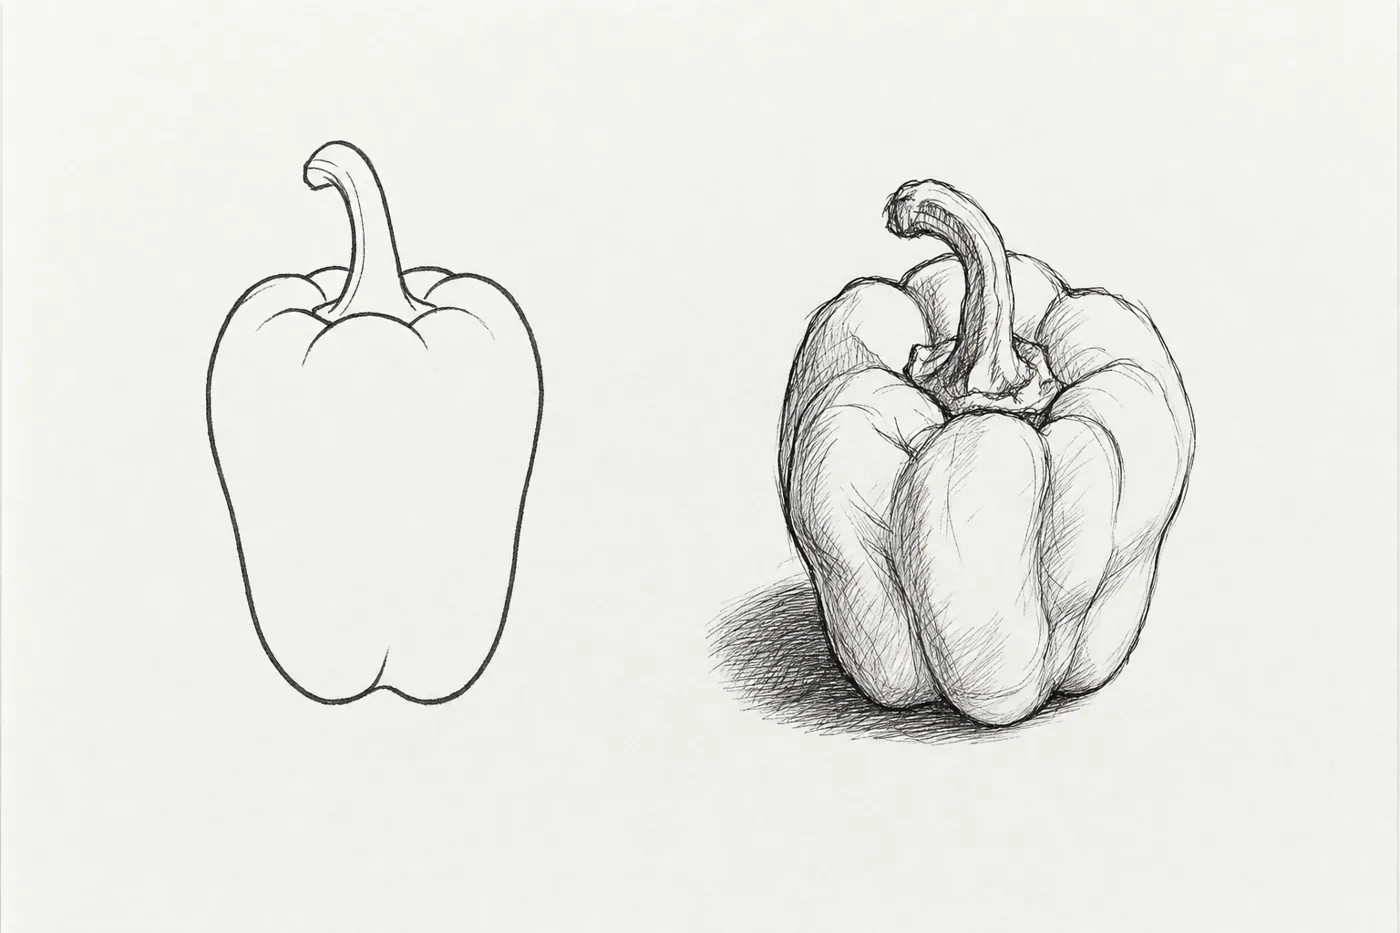
Without looking at the object, draw it from memory for 10 minutes.
Now put the object in front of you and draw it again for 10 minutes, beside the first drawing. Look at the object more than at the paper.
Compare the two. Under the second drawing, write three things it shows that your memory didn’t know.
Why
The memory drawing shows the symbol in your head. The life drawing shows what was really there. The gap between them is what this course closes.
Success looks like
Two clearly different drawings and a list of three specific differences, such as “the stalk is thick and twisted” or “it sits on four lumps, not a flat base”. How good either drawing looks doesn’t matter.
Left: the pepper you remember. Right: the pepper on the table.
After Bert Dodson, Keys to Drawing (1985), chapter 1. Verify against book
Your baseline set
4 × 20–30 min
Setup
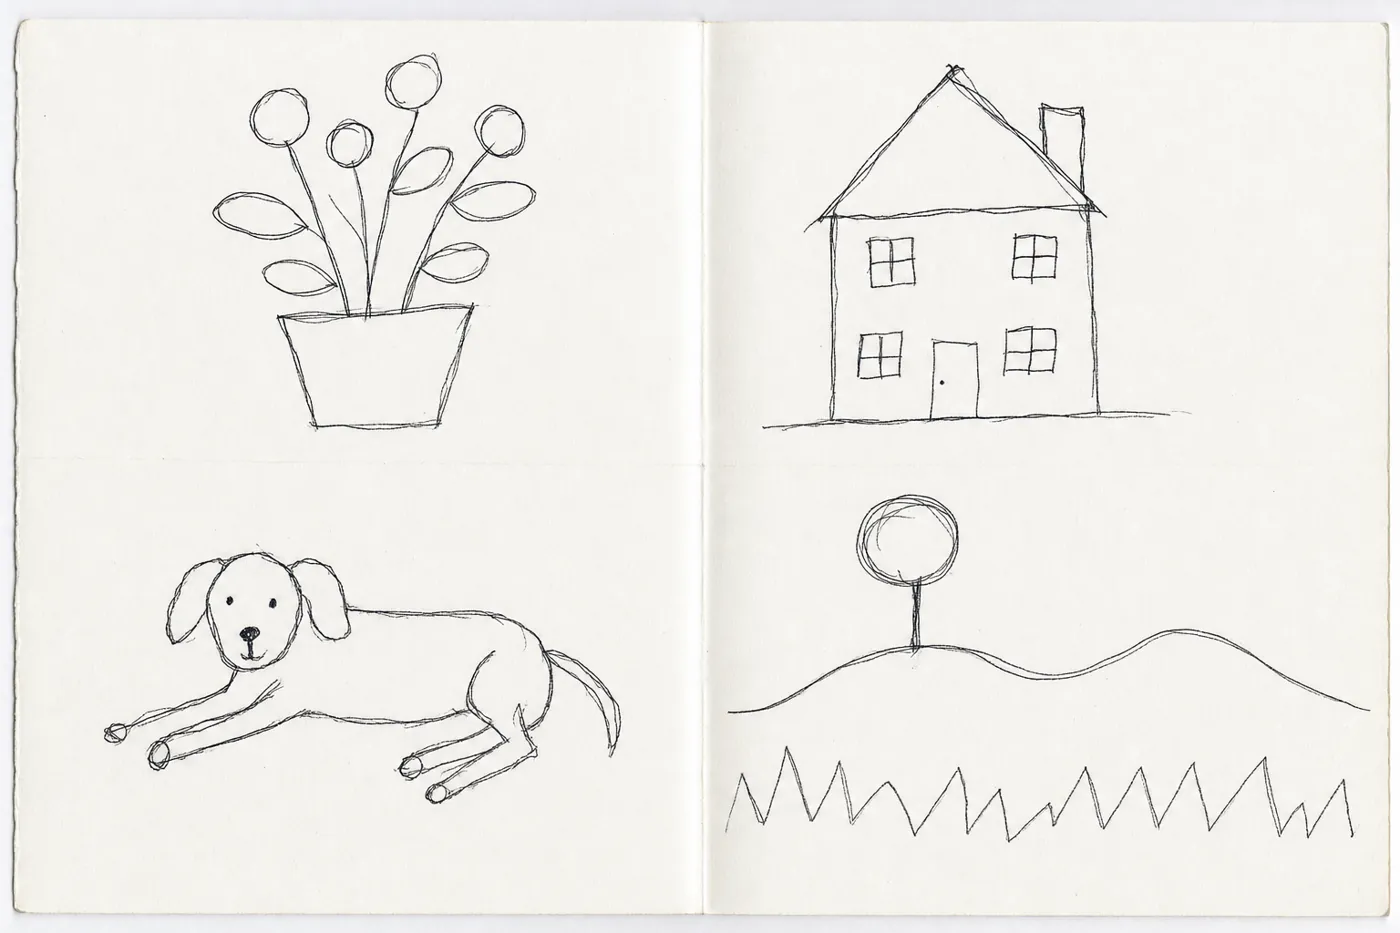
Four subjects, drawn from life if you can: a plant, a building, an animal and a landscape. A pet or hens will do for the animal. Use a photo only if nothing will stay still. Pen only, no pencil and no eraser. Print the baseline log.
Steps
Draw each subject for 20–30 minutes at your normal speed. Don’t slow down to make it nice.
On the back of each drawing, write the subject, date, time taken and pen used.
Photograph each drawing square-on, in even light (shade, not direct sun), with the whole page in frame.
Fill in the first row of the baseline log.
Why
This is your “before”. Once a month you’ll draw the same four subjects at the same size and for the same time, then put the drawings side by side. It’s the clearest evidence you’ll get that the practice is working.
Success looks like
Four dated, honest drawings and four clear photos. Wobbly lines and symbol-drawing are expected and fine.
A typical baseline. This is a starting point, and it’s exactly what you want to capture.
Adapted from the pre-instruction drawings in Betty Edwards, Drawing on the Right Side of the Brain.
Ten minutes a day
10 min a day, 7 days
Setup
Your sketchbook and pen, a timer, and a time of day you can keep, such as after coffee or before dinner.
Steps
Pick anything in front of you: a cup, a chair, the view out of the window.
Start the timer and draw it from life in pen.
Stop when the timer goes, even mid-line.
Write the date on the page. Don’t judge the drawing.
Why
Short daily practice beats long occasional sessions. The habit matters more than any single drawing, and ten minutes is short enough that you’ll never have an excuse to skip it.
Success looks like
Seven dated pages on seven consecutive days. If you miss a day, start the count again.
The ten-minute standard comes from Shari Blaukopf, who restarted her own drawing by sketching for ten minutes every day.
Common mistakes
Buying too much kit. A full set of paints and five sketchbooks makes it harder to start, not easier. Blaukopf’s advice for location work is not to bring everything.
Making the baseline nice. Drawing slowly, starting again or tidying up hides your real starting point. A neat baseline makes your progress invisible later.
Waiting for a good subject. The daily ten minutes works on a sock or a light switch just as well as on a view.
Rubric
Module 0 has no quality bar. These points check only that your baseline is usable for comparison later.
Drawn in pen, with no erasing or starting again.
Drawn within the stated time, at normal speed.
Drawn from life, or the photo source is noted.
Photographed square-on, evenly lit, with the whole page visible.
Each point scores 0 (missing), 1 (partly) or 2 (clearly there).
Ready to move on when…
Your four baseline drawings are dated, labelled and photographed.
Your kit is together and the wash test passed.
You’ve done seven consecutive days of ten-minute sketches.